Time
Film and video images are often referred to as
frames and most animation is measured using frames as the main unit of time.
The relationship between
these frames and real time differs depending on
whether you are working with video, film or other
digital media.
By default, Maya plays at 24 frames for every second.
Time Code
Time code is a frame numbering system that assigns
a number to each frame of video that indicates
hours, minutes, seconds and frames. This is what
gets burned onto video tape. This gives you an
accurate representation of time for synchronization.
You can set up time code display in Maya from the
Preferences window.
How Objects Are Animated Using Keyframes
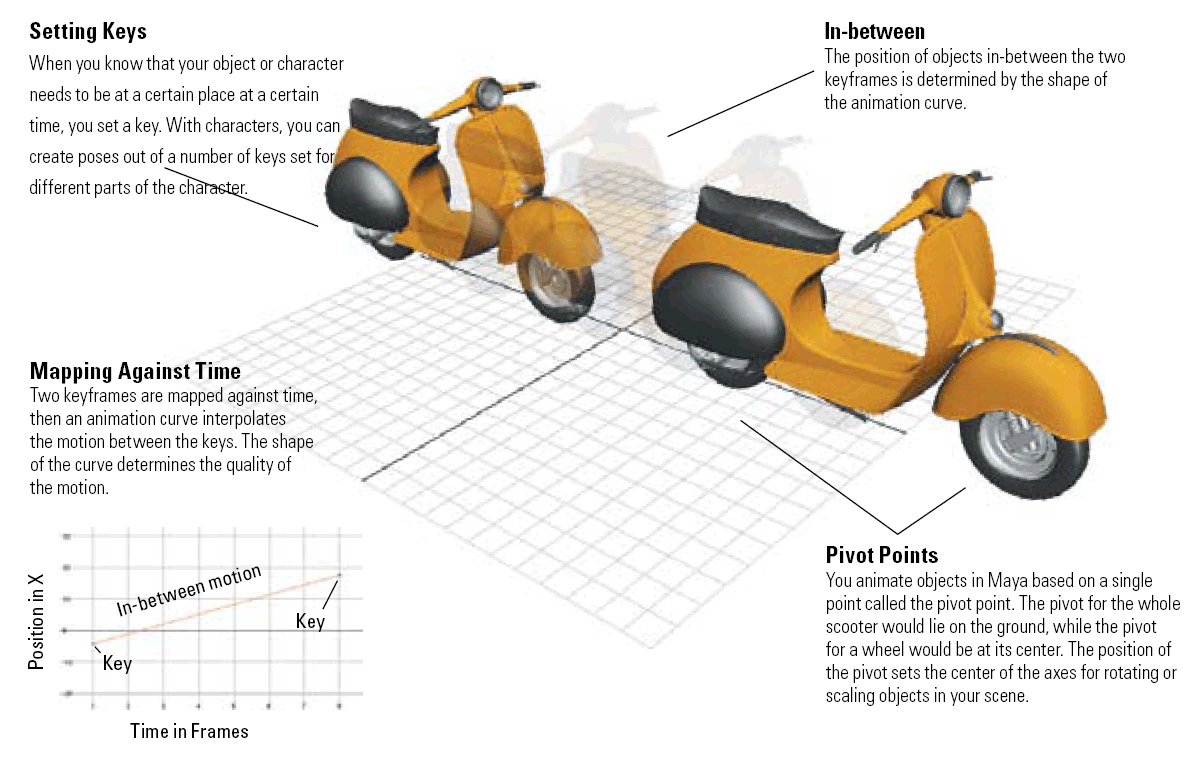
Keyframe animation is created by capturing values for attributes such
as translation or rotation at key points in time. An animation curve is
then drawn between the keys that defines or interpolates where the
object attribute would be at all the in-between frames.
Animation curves can be viewed as a graph where time is mapped
to one axis and the animated attribute is mapped to the other. In Maya,
virtually every attribute can be animated in this manner. The way in
which you set keys and control the in-between motion determines the
quality of an animation. As scenes become more complex, you will
learn to create control attributes that can drive the motion of different
parts of your scene to help simplify the process of setting keys.
Keyframe animation
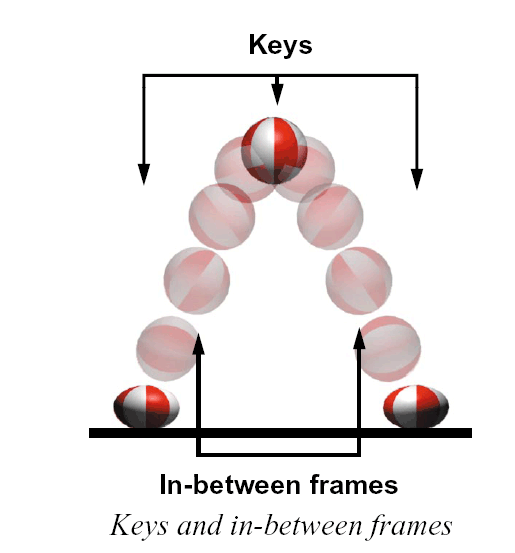
The most familiar method of animating is
called keyframe animation. Using this
technique, you determine how you want the
parts of your objects to look at a particular
frame, then you save the important attributes
as keys. After you set several keys, the
animation can be played back with Maya
filling motion in between the keys.
When keys are set on a particular attribute,
the keyed values are stored in special nodes
called animation curves nodes. These curves
are defined by the keys which map the value
of the attribute against time. Shown below is
an example of several animation curve nodes
connected to a transformation node. One
node is created for every attribute that is
animated.
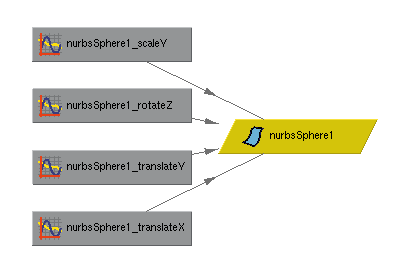
Dependency graph showing curve nodes
Once you have a curve, you can begin to
control the tangency at each key to determine
the quality of the motion in between the main
keys. You can make your objects speed up or
slow down by editing the shape of these
animation curves.
Generally, the slope of the graph curve tells
you the speed of the motion. A steep slope in
the curve means fast motion while a flat curve
means no motion. Think of a skier going
down a hill. Steep slopes increase speed while
flatter sections slow things down.
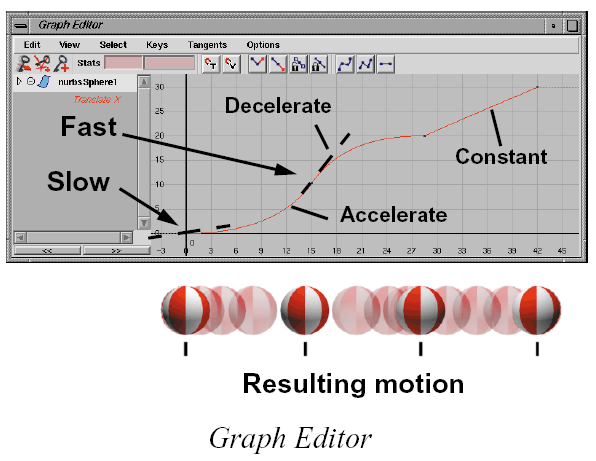
You will learn how to set keys in Lesson 1
and how to edit the animation curves in
Lesson 2. You will then continue to set keys
throughout the rest of Learning Maya.
Path animation
Path animation is already defined by its name.
You can assign one or more objects so that they
move along a path which has been drawn as a
curve in 3D space. You can then use the shape
of the curve and special path markers to edit
and tweak the resulting motion.
You will learn how to set up and edit path
animations in Lesson 13.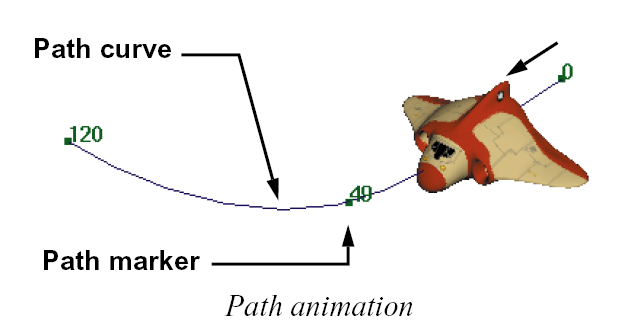
Reactive animation
Reactive animation is a term used to describe
animation in which one object is animation is
based on the animation of another object.
An example of this technique would be
moving gears where the rotation of one gear
is linked to the rotation of other gears. The
animator can then set keys on the first gear
and all the others would be animated
automatically. Later, when the animator
wants to edit or tweak the keys, only one
object needs to be worked on and the others
update reactively.