
Размещение одинаковых объектов в доль линии.
1.Содаем объект
2.Создаем траекторию движения

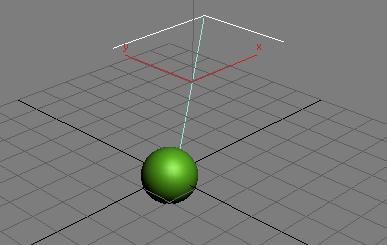
3.Выделяем объект

Using the Spacing Tool
1.Select one or more objects to distribute.
2.Choose Spacing tool from the Array flyout or the Tools menu.


или
Shift + I

3.Устанавливаем количество объектов Сount =10

4.On the Spacing Tool dialog, click Pick Path

5.Перемещаем укатель мыши на прямую
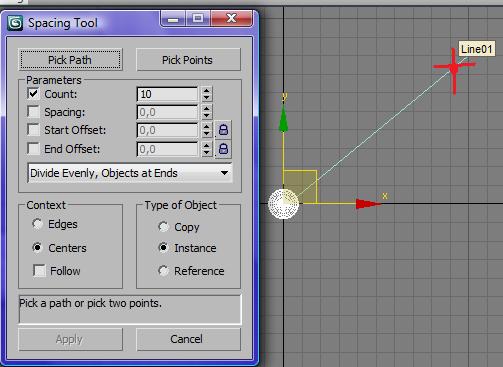
6.Нажимаем левую кнопку мыши и получаем результат


7.Редактируем

8. Завершаем

Параметры Spacing Tool
|
|
||
Пернд и использованием кнопок Pick Path или Pick Points выбрать клонирукмый объект.
3.On the Spacing Tool dialog, click Pick Path or Pick Points to specify a path.
If you click Pick Path, select a spline from your scene to use as the path.
If you click Pick Points, click a start point and an end point to define a spline as the path. When you’re finished with the Spacing Tool, 3ds Max deletes this spline.
4. From the drop-down list at the bottom of the Parameters group, choose a spacing option.
The parameters available for Count, Spacing, Start Offset, and End Offset depend on the spacing option you choose.
5.Specify the number of objects to distribute by entering a Count value, or by using the spinner.
6.Depending on the spacing option you choose, adjust the spacing and offsets.
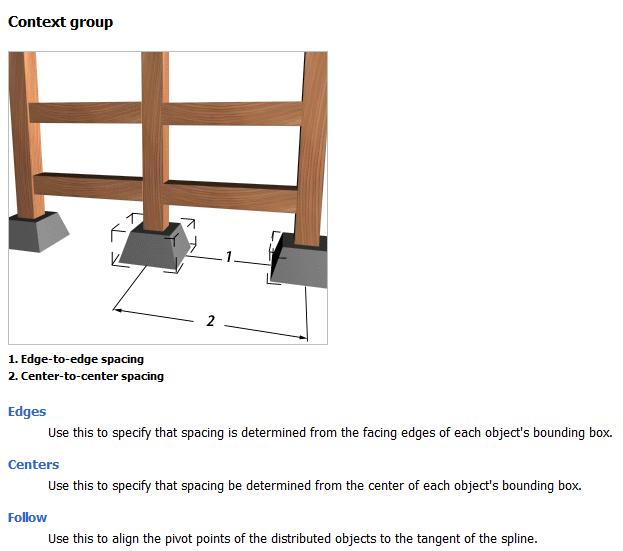
7.In the Context group, choose one of the following:
Edges specifies that spacing be determined from the facing edges of each object’s bounding box.
Centers specifies that spacing be determined from the center of each object’s bounding box.
8.To align the insertion points of the distributed objects to the tangent of the spline, turn on Follow.
9.In the Type Of Object group, choose the type of object to output (copy, instance, or reference) and click Apply.